


At the beginning of the school year, I saw a ton of painted craft paper banners for back to school flooding social media. The kind with big, bold letters and that perfect “handmade but still aesthetic” vibe. I thought it was a cute, easy, fun way to celebrate all the things by making a unique custom banner instead of a generic store-bought sign. They looked so fun and personal, and I immediately thought, “This would be perfect for my daughter’s birthday party.”

As a crafty mom, I love a good DIY project, but I didn’t have a projector, and I don’t have the best large banner writing skills. So I started searching for an easy tutorial and came across one on making their own painted banners without a projector. No fancy equipment, just a cardboard box, some transparency film, and a little creativity. I decided to give it a try, and it turned out so cute!
What You’ll Need:
- Phone or flashlight
- Pencil
- Brown roll of paper (Dollar Tree)
- Inkjet transparency film
- Printer
- Tape
- Acrylic Paint
- Paint Brushes
- Utility Knife
- Scissors
Step 1: Plan Your Design
Go into Canva and create your design. Create an 8×4 custom design template. Add in elements that relate to your party or event. Make sure you start small and don’t add a bunch of elements that have a lot of detail because these elements will act as a “shadow”. For beginners, pick basic shapes and fonts that have a simple outline that you can trace.
Step 2: Printing
Make sure your images are black or dark gray. This will help it give a shadow effect. Once everything is completely blackened, download and save your image as a PNG with a transparent background. Pull up the image and make sure you flip it horizontally in the printing settings or in Canva. Print onto your inkjet transparency film.
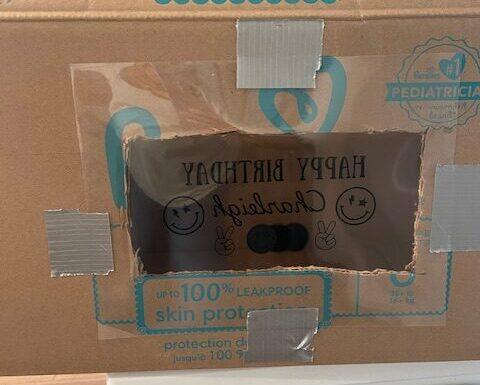
Step 3: Build your Box “Projector”
Take your box and cut out a rectangular hole that fits your printed design. Tape your design onto the box. Make sure you put your image on your box reversed. Take your phone with the flashlight on and put it inside the box to project the image onto your paper. I tried this with a regular flashlight, and it did not work as well as the phone flashlight.
Step 3: Trace Your Image
Tape your brown paper roll onto the wall and adjust your box projector so you can see the image reflecting on your paper roll by moving it forward or backward to get your image reflection centered on the paper.. You will have to turn off the lights so you can see the image reflection clearly. Once it is placed how you want it, you can begin tracing.
Step 4: Paint Away!
Now for the fun part. Using acrylic paint, fill in your letters with your chosen colors. Take your time here — a steady hand and a flat brush make all the difference. A lot of lighter colors can be transparent on the brown paper, so you will need to first go over it with a coat of white paint, let it dry, then go over with your lighter color as the top coat.
Step 4: Add the Details
Once the letters are dry, add little touches like stars, hearts, flowers, or abstract shapes around your message. This part is what really gives it that custom, artsy look.
Step 5: Let It Dry & Hang It Up
After everything is fully dry, hang your banner on a wall, above the dessert table, or as a backdrop for photos. I added some fun paper plate flowers to go with the theme.
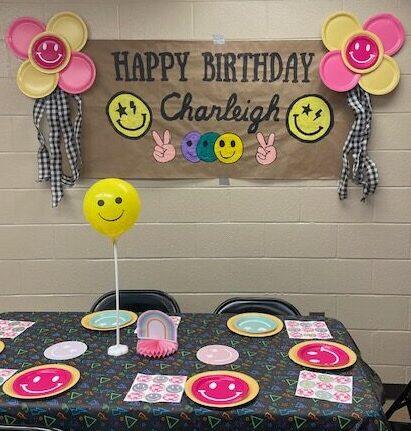
The finished banner turned out better than I imagined! It added such a sweet, personal touch to my daughter’s birthday setup, and now it’s something I can reuse for future parties or even hang in her room. Another fun idea is to have the party attendees sign the banner or write a sweet birthday message.
This is one of those projects that looks complicated but is totally beginner-friendly once you dive in. I can’t wait to make my next one and try a few more added details and improve this skill.


