


The Perfect Beginner’s Valentine’s Craft
I love craft projects and am rarely not in the middle of one. Over the years, I have tried just about every type of craft there is. So believe me when I say that hand embroidery is one of the easiest beginner crafts! When dabbling in the crafting world, people tend to gravitate towards crafts involving paper (who hasn’t tried their hand at scrapbooking?!). However, I think paper crafts are the least forgiving of all and I definitely would not start with that.
Hand embroidery is the ideal beginner Valentine’s craft because…
- It is very forgiving
- It produces something you can actually use
- It is fast
- You don’t need many special tools to get started
- It is versatile
Valentine’s season is the perfect season to jump into hand embroidery because the second you add a heart to something, it instantly feels festive! You can choose to stitch a small heart or a large heart so it lends itself well to your comfort level. I have had 6-year-olds with no previous sewing experience learn how to stitch a heart!
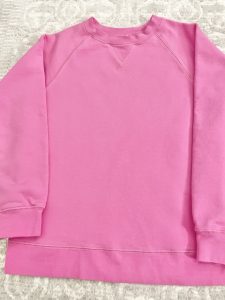 Let’s get started! For this project, I began with a blank sweatshirt. I chose this one because I already know that my daughter (age 10) loves the fit. It’s a little pricey, so if that’s not for you, you can always go with the crafting blank sweatshirts for around $10 or a blank T-shirt for around $5. If you don’t want to go the sweatshirt or T-shirt route, you can really choose any fabric item you’d like…a tea towel, pillowcase, shirt collar, bag, napkin, etc. Just be sure to use a fabric that doesn’t have a lot of stretch to it, as those types of fabric are the hardest to work with. Whichever item you choose, wash and dry it like you normally would before you begin the embroidery project.
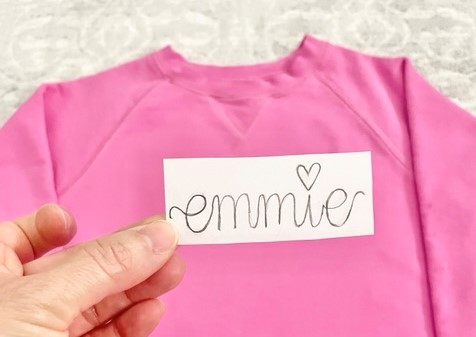
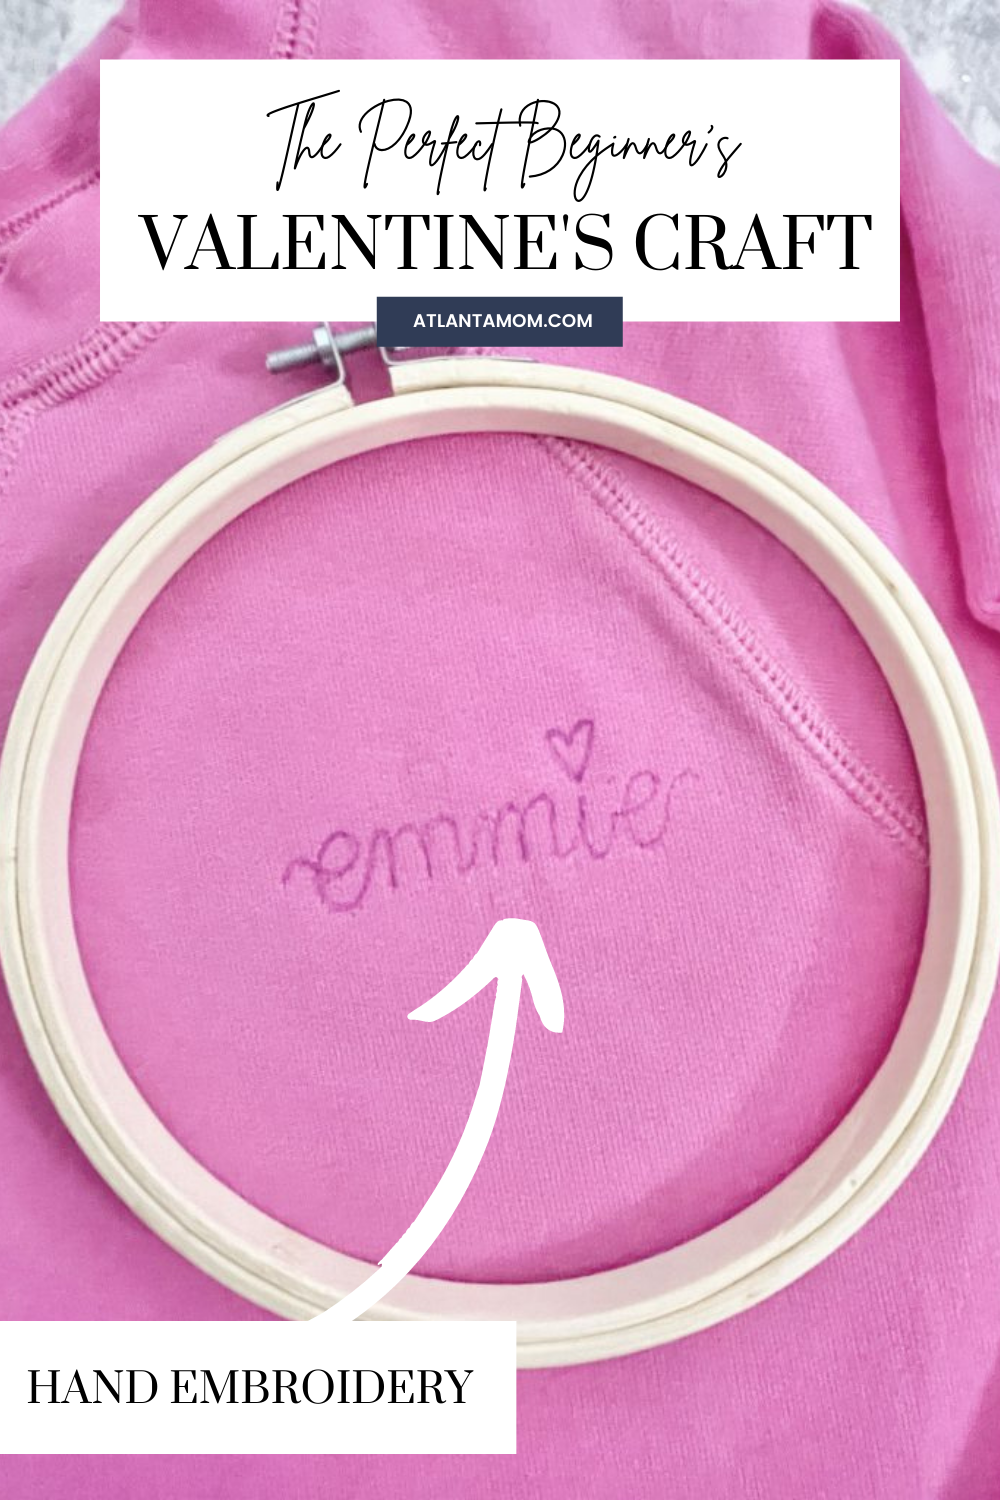
For my daughter’s shirt, I wanted to embroider her name with a heart above the “i.” You can choose a simple heart if you’d like! Lay your shirt flat and then cut a plain piece of paper the size you’d like your finished product to be. Using a pencil, draw your design on the paper. Then, place your paper on the shirt to be sure it’s the size you’d like. Pin it or tape it in place. Using an air erasable pen, trace your drawing onto your shirt by poking through the paper, leaving a dot on the shirt. Continue along the entire drawing, then remove the paper. Connect your dots so you now have a complete copy of your drawing on your shirt. If your design doesn’t look good, use a hairdryer on the cool setting to erase your pen mark and try again. See?? So forgiving! You could also skip the drawing on paper and transfer steps altogether if you would rather draw your design directly on your shirt.
Next, find an embroidery hoop that fits your design. Unscrew the top portion to separate the loop into 2 pieces. The plain piece goes underneath and the piece with the screw goes on top. Clamp the hoops together and tighten your screw so that the portion of your shirt with your design is in the middle of your hoop. Pull the shirt so it’s taut in the hoop. 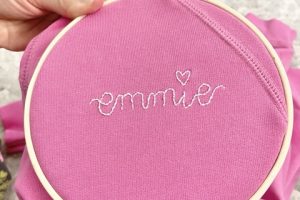
Choose your thread. I prefer DMC embroidery floss which is available at any craft store in single skeins for around $0.50. But a lot of times, I choose the Amazon route where I can buy a bunch of colors and have them delivered. The quality of the thread is not the best, but it will work for seasonal projects like this, or if you are just playing around. For projects that need to stand the test of time (like heirloom dresses) definitely stick with DMC.
The anatomy of embroidery floss… This is the same stuff friendship bracelets are made of! But for hand embroidery, you can’t use it as is. Cut the length of string to about 16 inches. Then, look closely at the end and you’ll see that the string is actually made up of 6 individual strands. For hand embroidery, you only need 1-3 strands, depending on your stitch. For this project, we are doing a backstitch (aka, outline stitch). This YouTube video will show you how to do it. I like to you 3 strands. The secret to beautiful stitches is fluffing your strands before you begin. So, rather than separating your thread straight down the middle, you pull out 1 strand at a time, then you put 3 back together before putting it in your needle. This quick video shows how to separate them.
Now the fun part! Starting at one end of your drawing, outline stitch along your lines. You will have to pull the fabric in the hoop periodically to be sure it is taut. If you mess up, you can simply pull the thread out and start over! You can’t do that with paper crafts. Once you mess up the paper, you’re done.
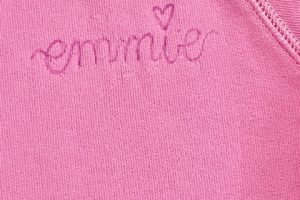
When you’re finished with your design, you pop the hoop off and you’re done! Sometimes, the hoop will leave a mark on the fabric. If you pulled the threads out a couple of times, you might also notice tiny holes left in the fabric. Those will both go away after the fabric is washed. You only have about an hour before your air erasable pen will start to disappear. To avoid this, you can put it in a zip-top bag when you’re not working on it. They also make water erasable pens if you don’t want to worry about it altogether. This project took about 30 minutes, including the time it took me to snap pictures so an hour is probably generous if you’re a beginner. Side note, excuse the bad lighting in the pictures, crafting usually happens after kids’ bedtimes for me so it’s always dark when I’m working. #momlife
 This technique can be used for other designs and holidays. My daughter, Emmie (age 10) had a Valentine’s craft sewing party last year where they made 3 hearts. Then she made the cutest embroidered bunny napkins for Easter. The possibilities are endless! If you try your hand at hand embroidery, I’d love to see what you create! Tag me in your photos, @sandracelebrates!
Supplies (clickable shipping links)
- Shirt
- Embroidery hoop
- Embroidery floss
- Needles (I prefer size #5)
- Air erasable pen or water erasable pen
Looking for other simple Valentine’s crafts? Be sure to check out this post from Atlanta Mom!


